Introduction
If your current patio feels cramped or no longer meets your needs, expanding it can transform your outdoor living space into something more functional and inviting. Learning how to expand an existing patio allows you to add room for larger dining sets, a fire pit, outdoor kitchen, or simply more space to relax. Whether your patio is concrete, pavers, or stone, extending it is a manageable project with proper planning and preparation.
Why Expand a Patio?
Adding space isn’t just about looks—it’s about lifestyle:
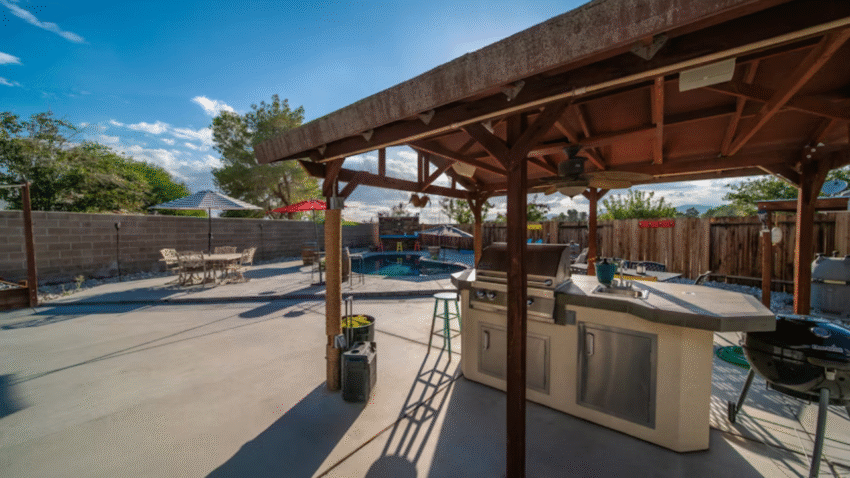
- Improved Functionality: Accommodate more guests or features like grills and seating.
- Enhanced Property Value: Larger outdoor spaces appeal to buyers.
- Design Flexibility: Extend with matching or contrasting materials for a custom look.
- Cost-Effective Upgrade: Expanding is often cheaper than rebuilding entirely.
With the right approach, your patio can grow alongside your needs without breaking the bank.
Step-by-Step Guide to Expanding an Existing Patio
1. Assess the Current Patio
- Type: Is your patio concrete, pavers, or natural stone? Each requires a different expansion method.
- Condition: Check for cracks, sinking, or unevenness. Repair before extending to avoid carrying issues into the new section.
- Drainage: Ensure water flows away from your home—expansion should not block or change drainage paths.
2. Plan the Expansion
- Size and Shape: Decide how much more space you need. A simple rectangle is easiest, but curved or angled extensions add flair.
- Design: Choose whether to match existing materials for seamless integration or use contrasting textures for a stylish border.
- Permits: Some municipalities require permits for larger patios. Check local codes before starting.
3. Gather Tools and Materials
You’ll need:
- Shovel and wheelbarrow
- Tape measure, stakes, and string
- Gravel and sand (for base layers)
- Pavers, concrete mix, or flagstones
- Level, rubber mallet, and tamper
- Concrete saw (for trimming edges, if needed)
- Broom and garden hose
4. Prepare the Ground
- Mark the expansion area with stakes and string.
- Excavate 6–8 inches of soil to create space for the base.
- Remove grass, roots, and debris to prevent shifting later.
- Compact the soil using a hand tamper for stability.
5. Build a Solid Base
- Spread 4–6 inches of crushed gravel across the area.
- Compact in layers to prevent settling.
- Add 1–2 inches of leveling sand on top. Smooth it out with a board or rake.
A stable base ensures your new patio section won’t sink or shift over time.
6. Match or Prepare the Edge of the Existing Patio
- For concrete patios: Use a concrete saw to cut a clean edge if the side is rough.
- For paver patios: Remove edge restraints if needed and prepare to interlock new pavers with old ones.
- For stone patios: Align expansion stones with existing ones for a natural blend.
7. Install the New Surface
For Pavers or Bricks:
- Lay pavers from the existing edge outward.
- Tap each paver into place with a rubber mallet.
- Check alignment with a string line.
For Concrete:
- Build a form with wooden boards along the expansion edge.
- Mix and pour concrete to match the existing slab’s thickness.
- Smooth with a trowel and use a broom finish to blend texture.
For Flagstone or Natural Stone:
- Place stones into the sand base, fitting them like puzzle pieces.
- Adjust with sand underneath until level with existing patio.
8. Fill Joints and Finish
- For pavers: Sweep polymeric sand into joints, then mist with water to set.
- For concrete: Remove forms after curing and seal the surface if desired.
- For stone: Brush sand or mortar into gaps for stability.
9. Seal and Protect
Apply a sealer appropriate to your surface to protect against stains, weather, and wear. This helps new and old sections age more evenly.
10. Decorate and Enjoy
Once cured and sealed, furnish your expanded patio with seating, dining sets, or planters. Consider adding rugs, lighting, or a pergola to make the larger space even more functional.
Common Mistakes to Avoid
- Mistake: Skipping Base Preparation
Weak bases lead to sinking and uneven surfaces.
Solution: Always excavate, add gravel, and compact thoroughly. - Mistake: Ignoring Drainage
Expansions that block water flow cause flooding.
Solution: Maintain a gentle slope (about 1/8 inch per foot) away from the house. - Mistake: Mismatched Materials
Clashing colors or textures reduce curb appeal.
Solution: Match existing materials or intentionally contrast with borders. - Mistake: Pouring Concrete Directly on Soil
This leads to cracks and sinking.
Solution: Always use a gravel base beneath concrete. - Mistake: Rushing the Job
Skipping curing time or compacting steps shortens patio lifespan.
Solution: Take time to do each step properly.
Extra Patio & Deck Tips & Hacks
- Add a border with contrasting pavers to make the extension look intentional.
- Incorporate built-in planters or seating into the new design.
- For large expansions, divide into zones (dining, lounge, fire pit).
- Install lighting along the new edge for ambiance and safety.
- If expanding with pavers, consider using permeable pavers for eco-friendly drainage.
Looking for more ways to upgrade your outdoor space? See our guide on how to add a pergola to a patio or deck.
Conclusion
Learning how to expand an existing patio is an achievable DIY project that adds both function and beauty to your backyard. By planning carefully, preparing a solid base, and blending materials thoughtfully, you’ll create a seamless extension that enhances your outdoor lifestyle.
Pro tip: Expansion is about more than just space—use the opportunity to rethink your patio’s design and create an outdoor area that grows with your needs. Bookmark this guide and enjoy your bigger, better patio for years to come.